I created this for my Granddaughter who has been vacationing at the beach this past week. I thought she might like to print out some of the pics she took and just add them to this cutie. The pocket part of these wonderful ID Badge Holders makes it so simple to add a picture front and back.
I could have made a cover for this mini album, but thought the ID Badge Holders stood fine on their own. Just slip some designer paper in and, whala - instant cover!!! So that's what I did. I used CTMH Seaside Designer Papers for the inserts in all the ID Badge Holders I used. I also "altered" those little Badges, cuz ya know, that's what I like to do also.
One this first page, which is the cover, I added press on sparkly letters to say "Beyond the Sea" right to the outside of the larger ID Badge. If she wants to slip a picture on this side of the Designer Paper she can, and the Title will still show.
I used a smaller ID Badge Holder for page two.
I thought it would be such a cute idea to add some glitter, glass beads and glass glitter along with some tiny sea shells for a shaker for page 3 using the larger ID Badge. I think it is the most adorable ever!!!
For page 4, I used the larger ID Badge Holder and slit it down the middle to form "doors" to open. She can add thumb print pictures to the Designer Paper glued into place on the front, as well as adding them to inside of each door. In the inside, she can add one or several pictures as she likes. Since I had to glue this paper into place, she can't slip a picture on the back side, so I used Rub-Ons to add some Beachy words to the outside of the backside of the Badge. I love how this looks!!!
Page 5 is a smaller ID Badge Holder that she can use both front and backsides on.
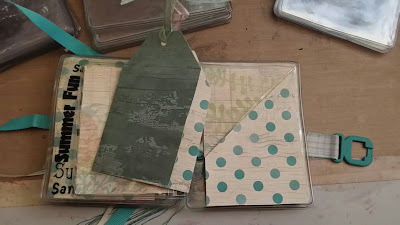
Page 6 is my favorite. I slit the larger ID Badge holder on an angle to create a pocket. I glued some of the CTMH Designer paper onto the slit front and in the inside. Then I added a double tag for more pictures in the pocket I created.
And once again, since she can't add a picture to the back side I used more Run-Ons to decorate. I just love that saying!!!
Page 7 is another smaller ID Badge Holder
Page 8 is the back cover. I used the larger ID Badge Holder and just left it plain so she can add whatever pictures she likes.
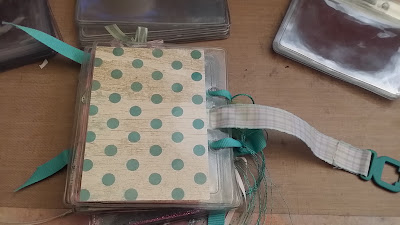
Now to assemble this... I love using ribbons on booklets and thought since these ID Badge Holders come with holes to add a chain, I would use them to thread the ribbon thru. This also allows my granddaughter the advantage of spreading the pages apart as she adds stuff. All she has to do is untie the ribbon and make it looser.
Now to close it, I had these adorable little clasps. So I strung a matching ribbon thru the slot where a lanyard would go, taping the edges down to hold the clasp. I love how this all co-ordinates with the colors of the sea. I just added some more ribbons and embroidery thread, cuz who doesn't like lots of pretty ribbons!!!
I also made a quick little video you can watch HERE to see the ID Badges Pages up close and see the interactive parts.
I hope you like this cute idea of using ID Badge Holders. Think of the possibilities!! A New born Baby Booklet with holders for a lock of hair, the first tooth, their name bracelet... A Christmas Mini Booklet that can be used year after year, just add new pics, keeping the old. A friendship booklet... Booklet of tiny keepsakes...
Please visit their website, by clicking HERE, to see all the great sizes and shapes of these little gems.
Supply List:
ID Badges:
#1815-1200 measure 4 1/2 inches x 3 1/2 inches
#1820-1000 measures 3 3/4 inches x 3 inches
CTMH Seaside Paper Pack
Making Memories Cheeky Shimmer Stickers
Making Memories Woven Ribbons and Attachments
My Minds Eye RubOns
Beach Sentiment RubOns
Finnabair Glass Glitter Pearl
Finnabair Glass Beads Crystal
Finnabair Micro Beads Silver
Finnabair Glitter Mardi Gras
Sea Shells
Thank you for visiting my blog.


I know she will love it. So cute.
ReplyDeleteWow! How lucky is she...a TabOriginal. So cool
ReplyDeleteNice job, Sylvia. Super cute and I'm sure your granddaughter will be tickled pink!
ReplyDeletethis is such a great idea - I am off to make some myself!!!
ReplyDeleteWhat a clever idea and I can see anyone would love one of these!!
ReplyDelete