Friday, December 19, 2014

Gift Journal Is Now Complete

Finally!!! I have completed "The Journal"!!! And none too soon either, as the exchange is tomorrow.... phew!!!

There are five signatures with 5 or 6 full pages for a total of 10 to 12 actual pages per signature. I left alot of space between the signatures because I knew the journal would expand with items. I found a beautiful lime green satin ribbon I just knew would look great with those LSG Magicals as a tie for the Journal closure.


Here are some more pictures of the Journal showing the spine. I did a macrame knot on the signature strings, adding a few silver beads. The knot is one that curls up upon itself, which I rather liked.


Here is that yummy lime green ribbon!!! I just punched a hole in the front and back covers with my Crop-A-Dile, tied the ribbon on each cover then made the cute bow to hold it together.


You can see all the signatures inside. I used designer paper from my stash in every color in the rainbow, trying to put some blue/purple/green papers in each signature. I also added parchment paper, manilla folders, and deli-wrap in most signatures just for kicks. On most of the pages, I folded up a 3 inch edge for pockets and added tags, journalling blocks, photo mounts, photo frames and what ever I thought she might need/use along with paper clips, printed words and other embellies.

Here's a final picture. I just love how it turned out and I can't wait to see the expression on her face!!


Thanks for stopping bye and taking the time to read my blog. I truly appreciate you doing so!!


Christmas Centerpiece

I posted a new video today over on my YouTube Channel -- taboriginal -- where I demo how to make a very cute candle arrangement for your table or mantel recycling toilet tissue and paper towel rolls.


You can view the video by clicking on the picture below, or using this link to my YouTube Channel -- taboriginal


Thank you for reading my blog and watching this video.

Merry Christmas!!!


Saturday, December 13, 2014

Journal For A Friend...

     I had decided to make a journal for a friend as a Christmas Present,
sneak peek here:


    Then the fun began -- what do I use to make the cover -- chip board, cardboard, 140# Watercolor paper, recycle something??? The ideas were endless but I ended up recycling cereal boxes. I used two of the same size, glued them together for added strength and thickness. I sanded the printed glossy side for better adhesion using Liquitex Matte Gel to glue together. I did not want the printed side out incase there might be any bleeding of the colors.
     When the matte gel set up, I cut the boxes to the size journal I wanted. Since I was using Designer Paper folded to 6x9 inch size, I made the front and back covers 6 1/2 x 9 1/2 inches to give a 1/4 lip all around.
     The sides of the cereal box were 2 3/4 inches wide which I kept, but cut the length to 6 1/2 inches.
      I cut duck cloth, which is a very heavy cotton material that resembles canvas, to 18 inches x 11 inches for the complete front/outside of the journal and 15 1/4 inches x 9 1/4 for the complete inside cover. The extra on the front cover allows for wrapping around to the inside for a finished look on the edges. Applying the smaller to the inside finishes the book. I left an eighth inch separation between the front/back cereal covers and what would be the spine, so the journal would close/open unobstructed.
     Using the Matte Gel, I glued all in place and left to dry over night. When all was dry I used Liquitex Gesso to all sides of the journal.
     I worked on the inside first. I wanted dimension, but not too much. I used gauze, lace, Magic Mesh, the mesh from an onion bag, felt flower strip, and dot tape, adhering all in place with matte gel. When all was dry, I added Liquitex Modeling paste for more dimension using a chicken wire stencil along with a harlequin, clock and dot stencils. Once all was dry, I covered it again in gesso.
     Using Lindy's Stamp Gang Gator Gumbo Olive and Jazzy Jivin' Purple Mardi Gras Mania Magicals and Tibetan Poppy Teal Autumn Leaves Collection Magicals, I sprinkled the DRY powders randomly over the inside covers. Then I spritzed with water and let the magic begin. I let the colors mingle and merge!! Where there was not enough coverage, I mixed the Magicals with water in Ranger Mini Misters and sprayed where I felt was needed.
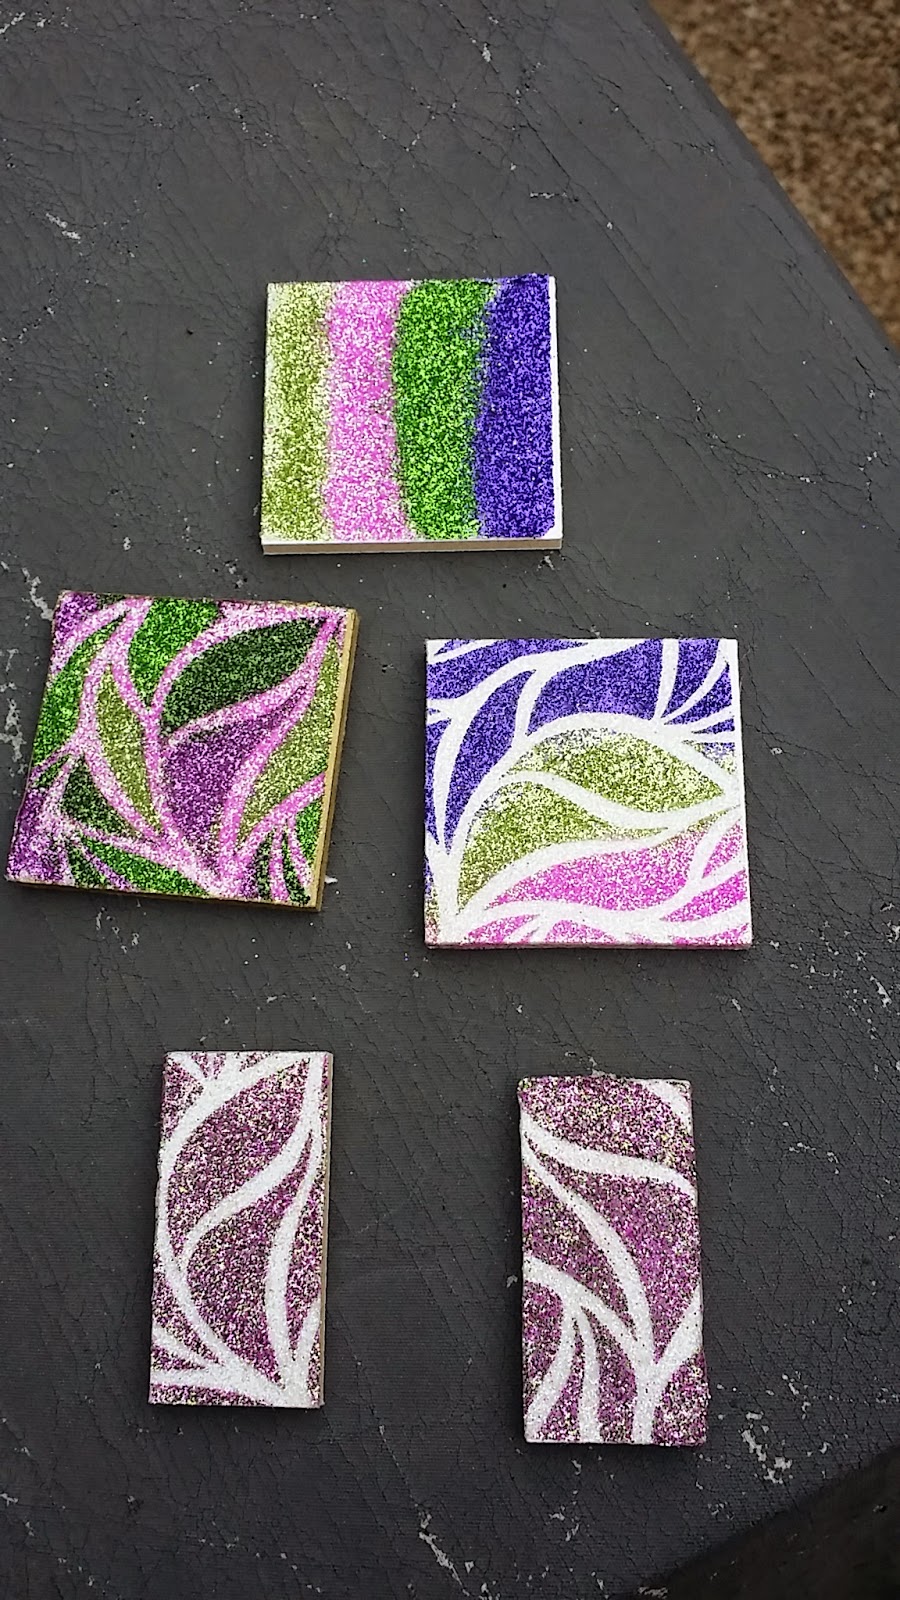
     When all was dry, I mixed glitter from Finnabair Art ExtraVagance Glitter Mardi Gras set (Prima) with Art Basics 3D Gloss Gel (Prima) spreading onto the felt flowers to make them "pop" with that amazing glitter sparkle of this line of glitter!!!
     I also mixed a thick paste using the Gator Gumbo Olive Magical powder and water. Using my finger to spread this past onto the all the stenciled areas to highlight them with that amazing green gold!!!
     The depth and sparkle of LSG Magicals is breathtaking and they co-ordinate so richly with the Finnabair Glitter!!

Complete inside:


Left inside cover:


Right inside cover:


     Now for the outside. I wanted dimension on all the sides, just like the inside. Using the same materials from the inside, I cover the complete front with onion packaging mesh, gauze, lace and ribbon and magic mesh. I used the same stencils and the modeling paste to add more dimension.
     When all was dry, using items from my "stash" I collaged gears, beads, flowers, and various metal objects onto the front then gessoed everything.
     Applying the same technique as I did on the inside covers, I sprinkled the same Magicals randomly, then spritzed with water, filling in with more color from the sprays I made.
     I finished the outside cover off with the same paste of Gator Gumbo Olive on all the stenciled items and on the metal pieces on the front.
     Using the glitter gel, I added the purple and olive colors to all the flowers and some of the metal pieces.
     To complete the front, I attached a few rhinestones in the the Mardi Gras colors and added white pearl sprays.
     The sentiment I printed on music paper and sealed with JudiKin Micro Glaze which is a wax I use to seal Ink Jet printed items.
     I sealed all with Grumbacher Final Fixative, since everything is water based. Sure would hate for this to get wet!!!
     Now, all I have to do is add all the signatures and this will be done!!!

The full outside cover:


Front of journal:

Trying to catch the simmer and glitter here:


The back side of the journal:


Full journal again:


     I just love how LSG Magicals are tonal and have a luster and shimmer unique to them. The depth of color is amazing and they are a perfect pairing with Finnabair Mardi Gras Glitters

     Thanks for sticking around to read this long description, I truly appreciate it.


Sunday, December 7, 2014

Cat

Over in the Kraafters Kommunity on Google Plus, we are always doing some kind of challenge. The current one is drawing a cat, so this is my take on that challenge..

Tigers are supposed to have white whiskers, but I could not get them to show up, but they are really there, really they are...


Thanks for taking to time to view my blog!!!

Monday, December 1, 2014

Mardi Gras Glitter

art ExtraVagance finnabair mardi gras glitter -- now that's a mouthful to say!!! But, boy o boy, is this ever amazing glitter.

First off, the colors are what I would expect to see at Mardi Gras -- greens (3 shades, 2 textures), pinks (2shades, one of each texture), and one amazing purple in the ultra fine glitter. Second the textures are ultra fine and regular, both have sparkle, sparkle, reflective properties that just radiate the light. And third, my all time favorite thing about this glitter is -- it has it's own sprinkle top!!! Yeah!!! A flip-up top that has tiny holes to sprinkle on just what you need with very litttle waste. And the added bonus of those tops is precision!!! Yes, precision!!! They dispense a fine little "shake" of the glitter that pretty much goes exactly where you want it to go. How cool is that!!!

Here are some sample boards I made. The top one is just some of the shades sprinkled onto double-sided tape that was adhered to a twinchy board. On the middle two boards, I used a stencil to control where I sprinkled the different colors. When I removed the stencil, I sprinkled the lighter shade of pink onto the left one, and I used a white I already had for the other one.

On the bottom two, I used the same stencil, but used all the leftovers from the above 3 twinchy boards that had fallen off after burnishing them. I added white glitter to complete the tiny boards and cover the stickiness of the double-sided tape. I love how all the colors mixed to give this unique blend!!!


I also shot a quick video because it is very difficult to show glitter in a still photo. I recorded outside hoping  to get the colors as true as possible, so apologies for the "airiness" of the sound. Plus you get the added bonus of seeing my little dog in the back ground!!


Over on Goggle Plus, I belong to this amazing community called kraafters kommunity.  The founder, Heather, has recently opened an on-line store where I purchased these glitters. Check our the community HERE and her store HERE or click the links above...

Thank you for stopping by!!!


Monday, November 24, 2014

Christmas Necklace

I dabble in alot of mediums, am master of none, but enjoy just trying...

And one of those mediums is Wired Jewelry. I began this journey because I wanted a wired flower for a card I was making. I went to all the scrapbook stores looking for the concept I had in my Mind's Eye, finding nothing, nada, zip... which was soooo disappointing.

Then I happened to wander into the jewelry aisle of Michaels thinking I might find something there. Oh, I found something all right!!! There, in front of me, were these spools of wire -- all colors of wire, all thicknesses, all types!!! My mind started whirling, that sight was intoxicating to a crafter. I began to have visions of the possibilities of adding wire to my cards, my multi media projects, tags -- oh, I was over joyed!!! But never once did jewelry making ever cross my mind. I just wanted to make flowers, and frames, and hearts, and stars -- well you get the idea -- everything!!!

And not knowing a thing about bending wire, I just grabbed a few spools that appealed to me. I knew I would need some tools to help bend that wire and, as luck would have it, or proper commercial placement of products, there were all the "tools" right next to that wire!!! Imagine that!! I grabbed a round thingy and a pliers thingy, oh and something to cut the wire with. I was happy, I knew I would be able to make my flower to complete that card.

I hurried home, all excited to begin. I sat at the kitchen table, dumped all my new found wonders onto the table, pulled out some of the brass wire, cut the length I thought I would need, and began bending that brass into little flower petals, then a stem with, how about a leaf here and one over there. I WAS HOOKED!!!

I must have made 50 flowers, trying all sorts of bending, forming, twisting I could think of. Then it hit me -- YOUTUBE -- I bet there are a "few" videos about bending wire.  Oh, silly, naive crafter!!! I spent the rest of the weekend glued to that iPad, watching all I could find on this new found love. Bending and shaping and forming that wire right along with all the fabulous tutorials I could find.

I learned about wire thickness, or "gauge" as "us" wire workers like to call it (hahaha); silver, copper, brass, bronze; anodizing, polishing; round, half round, square; dead-soft, half-hard, hard; hardening; coated or pure. Intoxicating for sure!!!

I have made a ton of "stuff' since then, and my family/friends have been privy to alot of that "stuff" whether they wanted it or not, I was eager to share. I have even made a few things I kept for myself.


This is one of those items, and I just love it. I found the pendant in Michaels in the Holiday Ornament Section and thought, "Hey, that would make a great necklace for Christmas".  I have experimented with chains, making all my own loops and clasps. I know I could use store bought "findings", but the OCD in me just needs for it to be as much as my own hand made as possible. Besides, links and chains and clasps and ear wires are so easy and fun to make. I can sit for hours bending and turning and hardening wire.

It is satisfying to see a long piece of wire turn into a ring, or necklace or earrings, or bracelet, or "flowers, hearts, stars and frames"

The links and clasp are hand made. The bale is from an old, old broken necklace that I bent into a hook and closed in the back, the Sleigh is from Michaels, the wire is bronzed, 18 gauge round, half-hard.


Now that Christmastime is upon us, I get to wear this. Thanksgiving Day marks the occasion, as that day, to me, begins the celebration of Christ's Birth and all that I am thankful for. It's a wonderful time where people seem to share more, care more. It is nostalgic, whimsical, magical filled with hopes and dreams. And one of the most precious sights of the Season, is to witness its Wonder through small children's eyes and see the world untainted, pure.


Thursday, November 13, 2014

Daughter's Altered Art for #ksdnov

Over in Google Plus I belong to an amazing community called Kraafters Kommunity.  Every month we have a Challenge and this month's is to alter something-- anything at all.  My daughter is a member also, but she is too modest/shy to post her kraftiness, but I am not. She never ceases to amaze me with her talents, from the kreative ideas she has incorporated into her home, the kraafts she shares/does with her children, and the art she kreates. She is always thrifty, recycling or using what she has and comes up some stunning projects, and this is her latest.


She had some wood from an earlier project that appeared to be calling to her, so she screwed pieces together to form this 3 foot by 3 foot base:


Then using her printer, she printed off images which she used as stencils, or guides, to paint their images onto the wood, creating this fabulous scene. She used left over white craft paint from her pumpkin project, which was sooo cute also


She is contemplating drilling holes to add lights to the Guiding Light and as stars in the sky. I think it would be beautiful, especially at night lighting up their mantle.


I think it is a stunning altered piece and showcases the depth of her talents.

#ksdnov


Friday, November 7, 2014

Tag Wreath

Want a simple, easy wreath for the Holidays to brighten your home or as handmade gift that looks sooo pretty? I just posted my KISS Video of a simple wreath made from shipping tags. Ya know, those cute little manila tags with string attached. Watch it here below or over on my YouTube Channel taboriginal

Here are a couple of pictures:


Watch the video here to see how simple these are to make:


Thank you stopping by my blog!!

Kraafters Kaard Exchange

I had a great time last night making kaards with some Kraafters over in the Kraafters Kommunity on Google Plus

We were to make a kaard, then send an unfinished version of it to each participating Kraafter.  Once we had all received our Kaards, we would schedule a HangOut in Google Plus. We all got together last night, kraafting to complete each kaard.

We even had a mystery kaard, supplied by Nanette. She sent us all the material for her kaard, with instructions not to open until the scheduled HangOut. Her's was the only one we had no direction for completion. It was up to us to use all the components and create a kaard, hopefully similar to hers. The Kraafter who came closest to Nanette's original kaard won a prize!!! I didn't win .. LOL

These are the kaards we made last night:


The idea/plan was for all to have a few kaards made for sending to family/friends. But I can't part with them, they are mine to keep. Each is so unique, just like the Kraafter who made it, so I will be keeping these as a remembrance of a fun night and a keepsake of an original piece of heART from each.

Wednesday, November 5, 2014

WOIW Week 5

BOOK

In Kraafters Kommunity on Google Plus,  the 5th Word Of Inspiration is BOOK.

My interpetation celebrates the printed WORDS of BOOKS, from the first scribed scrolls to the Gutenberg Press, to typewriters and today's computers.

I was fortunate to work for Arizona Highways Magazine as a programmer and computer operator. The Magazine had an old Gutenberg Press along with all the printer drawers filled with wooden typeface, in a little room next to the computer room, we called "The Museum". We also had the original printing press and composing table the Magazine was printed on. When The Magazine expanded, this wonderful equipment was donated to the Phoenix Museum of History. They in turn donated the Composing Table and Press to ASU's Walter Cronkite School Of Journalism


I loved those presses. Not only were they beautiful to look at, but those tiny pieces of wooden typeface were magnificent pieces of art. When I needed de-stressing time, I would wander into this room and just take in the visual of these presses and their smells... the wood was intoxicating. I would handle those typefaces and daydream about their usage. We also had something on the press bed ready to print, as we often did demos of the Gutenberg Press. Wonderful times!!!


So with my personal history lesson here, I feel Blessed to have been apart of that history. I still recall those days, and those presses as I work on my journals, or mixed media or cards... that special "something" that influences my choices in my crafting.

Here is a digital piece I did for BOOK. I used an old manual typewriter along with a printer's box filled with wooden typeface, a printer ticker tape and a printer seal. I chose a typewriter as focus, because of all the manuscripts, books, and papers that have been produced/written thru the years.  All those WORDS carefully laid down on paper for others to read, learn from, wander into imaginary places/lands, to give us hope, allow us to dream, or simply pass a Summer day reading for the pure pleasure of reading... and because I still have two manual ones and one very old electric...


Thank you for stopping by and reading my blog.


Saturday, November 1, 2014

Organic Stamps

Over in Kraafters Kommunity on Google Plus, Heather does a weekly show on kraafting.  Last week's show was all about Stamp Kaarving (yes, all those Ks and double As are intentional, part of being a Kraafters in Kraafters Kommunity).

Tina Van Eick and Sandra Artfully Made were guests on the show. They are Master Kaarvers, to say the least!!! We got to watch them kaarve stamps while they offered tips and tricks. Tina showed a few stamps she made from cuttings from her yard -- a clover and a daisy. They were so beautiful, organic and just captured those little flowers perfectly. So I thought I would do the same.

I love bougainvillea, their colors are so vibrant and the little flower is made of three petals stuck together into a dimensional triangle before they open up. I think I spent more time studying the bougainvillea for the right clipping than I did actually kaarving the stamp!!!

So, here is the stamp and the printed image. I use Distress Ink Pads in Mowed Lawn for the leaves, and Picked Raspberry for the Flowers. I stamped onto a watercolor background I had made many moons ago. I didn't want a plain white background, I wanted something that looked like "outside"...


Thanks for stopping by...

Face Sketching

Over in Kraafters Kommunity on Google Plus, alot of the Kraafters have been posting face sketches. It all stared very innocently by this rendition of a challenge from Sandra of Artfully Made 4 You. She said all you needed to do to draw a face was... "draw an oval, make a "T" down the middle, add some eyes, a nose and maybe a mouth"

So this is what a drew, following those directions. I do think I nailed it!!!


This lead to many others posting their drawings. Then +Zsuzsa Karoly-Smith posted a video about face drawing from Kathy Arbour. Wow, what a great video and tutorial about faces. Kathy explains the proportions of the face which was fascinating. She then went into painting with the proper highlighting techniques. I like my pencil drawing, and wanted to share it here...


If you are interested in drawing faces, check out Kathy's video... here


Wednesday, October 29, 2014

GIFT

October 22nd's WOIW is GIFT

Words of Inspiration Wednesday #WOIW in the Kraafters Kommunity on Google Plus.

I had so many thoughts flying thru my grey matter about this word and so many visuals in my mind's eye for how I would depict this word. It has so many meaning -- you receive a gift, your gifted, you have gifts, you gifted another, etc.

Then it hit me -- everything about our universe is a GIFT. The gift of life, the gift of sight, the gift of smell, touch, hearing. Every living being is a gift, every living organism is a gift. Every thought we have, every emotion we feel is a gift. Every choice we make, every decision made is a gift. Everything that exists makes us who we are -- we are all different, yet we are all made of the same thing.

Atoms -- they make everything we can touch, see, hear, smell, feel, taste. They connect us all together, and that's an incredible GIFT


Tuesday, October 21, 2014

Time Flies...

Over on Google Plus in Kraafters Kommunity. Heather has a weekly challenge called Words Of Inspiration Wednesday where she gives us a word and we are to create what ever we want that showcases that word. Week 1 was PAIN, week 2 was HOPE and this week is TIME. This is my entry...

Back in High School many, many moons ago, my Senior English Teach, Mr Rhodes, tasked us with an essay about TIME. He stipulated we were limited to 50 words or less. I freaked out -- how can you develop a theme and a conclusion in 50 words or less!!??

As I anguished over this, a little verse started playing in my head... I kept changing it until I got it down to what I thought was perfect. It stated a concept, I developed it, and there arose a conclusion ... all in NINE words!!! I was so excited to hand in my paper.

I remember the look on his face when he saw such few words on my paper, it was like a cringed surprise. But then he took the time to read it, and this smile crept over his face and he nodded to me. I knew I had A'd it before he even graded it, but what I did not know was he used it in every one of his classes as an example...

Time Flies,
Say Not So...
Time Stays,
We Go...


I could go into a big lengthy discourse here, explaining why I chose these words and their interpretation, but I think they speak for themselves, allowing each their own thoughts and ideas about the concepts of time -- the noun, the verb, and adjective


Stamp Carving

Oh My Goodness!!! I have discovered a new love, all thanks to the wonderfully talented Kraafters over in Kraafters Kommunity on Google Plus.  There are several who carve their own STAMPS!!! And they are masters at it, just simply stunning works of heART!!! One of the Kraafters, Miss Tina Van Eick has sent me some of her carved stamps stamped onto paper for me to use as guides to carve my own stamps.

Now, I am certainly NOT the expert she is, so I have modified one of the stamp guides she sent me because I just knew I could not carve the details she did. But I like it as I did it, because it worked for me.

This is her carved stamp image used on her card she sent me. (The stamp in this picture is the one I carved). Notice all the cute little irregular, almost ameba shaped "circles" on her card image and the plain white paper image she sent... there is no way I could do that, so I oped for just plain, ordinary circles, as you can see on the stamp I carved here...
Enlarge the picture and you can see all the intricate little squiggles around Tina's circles on the card she made and the stamped image,  and how mine are just circles on the stamp itself. Isn't her card GORGEOUS!!!


I stamped my image on off-white linen textured shinny paper with embossing ink, then sprinkled Champaign Embossing Powder and heat embossed. I then added several different colors of Sticklers to the the image to add sparkle to the ornament. Her image can be used for a multitude of items, not just an ornament. It could also be a necklace, or stamped several times it could be a ballroom skirt. It could even be an imaginary world in outer space!!!

Here's my card: I love how the flash caught the shininess of the textured paper and the sparkle of the Stickles!!!


And a close up of the ornament. I made a hanging hook from brass 22 gauge wire and "hung" it from the bough. I left it unattached for the movement of an actual ornament -- it swings and sways as you move the card...


I just want to give a big THANK YOU to Tina for sharing here little goodie with me. I love, LOVE it!! Hop over to the Kraafters Kommunity and check out some of her stamps... look in the Card Making Category and also Art Supplies. You can click on any of the highlighted words in this Blog, they are direct links to the kommunity and categories


Saturday, October 11, 2014

Hope Shines

WOIW  --  Word of Inspiration Wednesday

... is a weekly art project in Kraafters Kommunity on Google Plus. Every Wednesday, Heather gives us a word to Inspire our Creativity. This week's word is HOPE. Most every time I hear that word, the little Bible song I learned in Sunday School rings in my head. You know the one...


"Have Faith, Hope, and Charity,
that's the way to live successfully
How do I know
The Bible tells me so..."


I don't know of any person who does not have HOPE, regardless of your religion, or non-religion. Granted, you might call it dreams, or aspirations, or expectations, wishes, belief, desires, goals or promises, but we all have it, it is part of our very Being.

HOPE is a powerful word. And just like that little song, it is entwined with FAITH and CHARITY. They are one and the same, yet all different with their own respectful meanings, but none can exist without the others.  HOPE gives us the FAITH to LOVE (Charity).  FAITH allows us to HOPE through LOVE.  And LOVE binds our HOPES to FAITH.

All three are what gives us courage to face another day, to belief in ourselves, our accomplishments, to LOVE ourselves and one another, to have FAITH in ourselves and one another, and to have HOPE for our wellbeing, our Futures, our strengths to carry on.  

Even if the load is much to bear, or the road is bumpy and rocky, or the path is blocked... our HOPE sees us through. When days are beautiful and all things are right in our Lives, we still have HOPE... it is that smile that crosses our faces, or those tears of Joy, or that sweet music of a loved one's voice.

HOPE fills us up, it nourishes our Souls. It is the sweet nectar of FAITH and LOVE. It is our Salvation...


Friday, October 10, 2014

"Tag" Along With Me...

Manila Shipping Tag Booklet

I just posted my latest KISS Video over on my YouTube Channel -- taboriginal. It's a cute little booklet made from those adorable shipping tags, ya know the kind, manila with strings attached.

I inked them up with Distress Inks Seasonal Colors: Festive Berries, Pine Needles and Evergreen Bough, white embossed a few beautiful Christian Sentiments from Isaiah and Proverbs, adding dimension to the tags.

Check out the video below or over on my YouTube Channel HERE


Stills of the two little tag booklets:


Sunday, October 5, 2014

This Is The Face Of Pain

PAIN

I belong to a wonderful Community on Google+ called Kraafters Kommunity. Every Wednesday we are challenged with a Word which we are asked to use in a creative way.  On Oct 1st we were given PAIN.

I was struck by this word, and it has given me considerable thought. This is how I see PAIN:


What??? You don't see it?? Neither do I and neither do most people. We hide our PAIN, we mask it with the socially acceptable "Happy Face" -- the non-committal, non-expression face of nothingness. Why???

PAIN can range from the mundane annoyance to placating our Soul to God for strength to handle the torture.  It can be physical pain, emotional pain, real pain or imaginary pain. They all exist and they all affect us in varied ways.

We can "see" physical pain via cuts or bruises and as that heals we might see the scars left behind. We can't see the emotional pain, nor the toll it takes as it heals but leaves it's hidden scars that forever change us.

And no matter how much, or little, pain we have in our lifes, we never fully share it's depth with another. We keep it hidden because we can't express it, or we don't want to. We have our hidden reasons, so we will put on that "Happy Face" and go forth...


Monday, September 29, 2014

One Pull Wonders Day 6, Carolyn Dube Playtime

Day 6 -- It's A Drag (And That's A Good Thing)

I have gotten behind in my Gelli Plate Workshop, bummer.  As I play catch-up, I am jumping around with the Day's postings. This is Day 3, from Week 2.

I just love this technique because it involves 2 Gelli Plates, and I love working with 2 of them at a time. If you would like to play along, you can sign-up for Carolyn's Workshop HERE - One Pull Wonders

This is pull #1. It got a tad "muddy" which was expected because of the layering and paint, but I think it is pretty cool anyways. If you could see it in person, it looks 3D--- all the texture and layers and the swirls -- wow!!!


This is the second pull which brought up more of the initial (first) layers of paint:


I had soooo much paint on the GP i was able to get a 3rd pull:


And I certainly did not want to waste any paint on my little GP so here is the first pull from that. It is a tab muddy also, but that was expected here too. I did not want to "smooch" the paint, so I just laid the paper down and pulled it up:


Then I got another pull which still had a ton of paint on it but not the muddy, more of the other layers:


This is the 3rd pull from that little plate:


And a 4th:


And here's the 5th!!! I brayered on some gel medium to rewet the paint as it was starting to dry, but I still had these colors on and wanted them on a pull:


WOW -- such a fun technique!! 

If you want to learn some great GP Techniques and play along with us, click HERE for the link to Carolyn Dube's One Pull Wonders OnLine Workshop -- its wonderfully "funtastic" !!!